

Welcome to the whimsical world of cake pops, where creativity meets confectionery! These delightful treats, a fusion of cake and candy, have taken the dessert scene by storm. In this comprehensive guide, we’ll embark on a journey through the art of cake pop preparation, from the basics of crafting these bite-sized beauties to the final touches that make them irresistible. Whether you’re a baking novice or a seasoned pro, this article promises to be your go-to manual for all things cake pop. So, let’s roll up our sleeves and dive into the sweet, fun-filled adventure of cake pop making!
Ingredients and Tools for Cake Ball Instructions
Embarking on your cake pop method journey begins with gathering the right ingredients and tools. It’s like assembling your toolkit for a delicious adventure. Here’s what you’ll need to create these mouth-watering morsels:
For more general baking tips and tricks, visit Food Network.
Essential Ingredients for Cake Pop Method
First things first, let’s talk ingredients. You’ll need:
- Cake Mix or Homemade Cake: Choose your favorite flavor – be it classic chocolate, vanilla, or something more exotic. For more unique flavor inspirations, check out our Blueberry Lemon Cheesecake guide. Remember, the cake is the star, so pick a flavor that’ll make your taste buds dance!
- Frosting: This acts as the glue holding your cake pops together. Creamy, rich frosting not only adds flavor but also the perfect texture.
- Coatings: Typically, chocolate or candy melts are used. They come in various colors and flavors, adding that signature cake pop look and taste.
- Toppings: Sprinkles, nuts, colored sugars – the sky’s the limit. Get creative and let your personality shine through your choices!
Necessary Tools and Equipment for Cake Pop How-To
Now, for the tools of the trade:
- Cake Pop Sticks: These are the backbone of your cake pops. They need to be sturdy enough to hold the weight of the cake and coating.
- Baking Sheet and Cooling Rack: Essential for baking your cake base and cooling your finished cake pops.
- Melting Pot for Coatings: A must-have for achieving smooth, evenly melted coatings.
- Stylish Display Stand: Not just functional, but also a way to showcase your creations with flair.
With these ingredients and tools at your disposal, you’re well on your way to creating cake pop magic. Remember, the key to great cake pops is not just in the making but in the joy of creating something uniquely yours. So, let your imagination run wild and your taste buds revel in the delight of homemade cake pops!
The Cake Base for Cake Pop Recipe
Choosing the Right Cake Flavor for Cake Ball Recipe
Now, let’s get to the heart of your cake pop recipe – the cake base. The choice of cake flavor is a pivotal decision in this sweet endeavor. Whether you lean towards a rich chocolate, a classic vanilla, or perhaps a zesty lemon, each flavor sets the stage for your cake pops. Importantly, opt for a cake that’s moist and tender, as it forms the foundation of your pops. After all, a great building starts with a solid foundation, and the same goes for cake pops!
Baking the Perfect Cake Base: Cake Pop Baking Steps
Once you’ve chosen your flavor, it’s time to bake. You can either use a ready-made cake mix for convenience or go the extra mile with a homemade recipe. If you’re baking from scratch, follow your recipe meticulously. Accuracy in baking is key, as it ensures your cake has the right texture and moisture content.
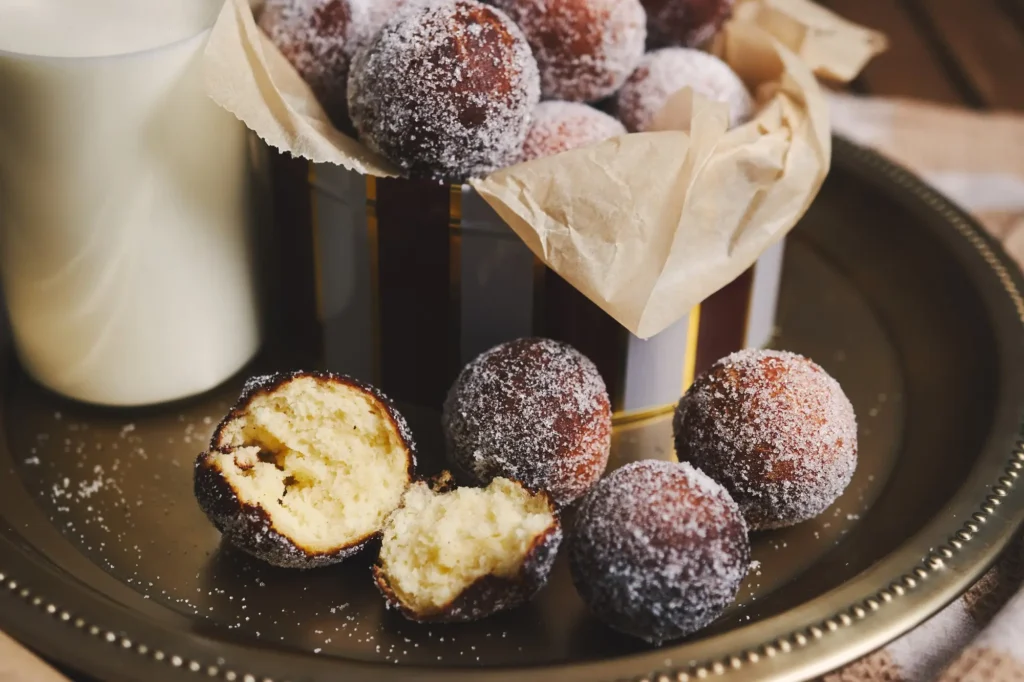
After baking, let your cake cool completely. This step is crucial; a warm cake can lead to a crumbly mess when mixed with frosting. Patience here is your ally. Once cooled, crumble the cake into fine, even pieces. These crumbs are the building blocks of your cake pops, so consistency is vital.
Remember, the quality of your cake base can make or break your cake pop recipe. So, take your time, choose your flavors wisely, and bake with precision. Up next, we’ll explore the art of mixing these crumbs with frosting to create the perfect cake pop mixture. Stay tuned for more insights into crafting these delightful treats!
Mixing and Forming Cake Pops
Combining Cake Crumbs and Frosting: Cake Pop Making Process
Transitioning from baking to assembling, the next step in your cake pop recipe is to create the perfect mixture. Take your cooled, crumbled cake and gently blend it with frosting. This is where the magic happens! The frosting not only adds flavor but also acts as a binder, holding the crumbs together. The key here is balance – too much frosting can make your cake pops too soft, while too little might not hold them together. Aim for a texture that’s moldable but not overly sticky.
Achieving the Ideal Consistency for Cake Pop Formulation
Once your mixture is ready, it’s time to shape your cake pops. Scoop out small portions – about a tablespoon each – and roll them into smooth, even balls. Consistency is crucial here; uniformity in size ensures even cooling and coating later on.
After shaping, these little spheres need to chill. Place them on a baking sheet lined with parchment paper and pop them into the refrigerator. This step is essential, as it firms up the balls, making them easier to dip in the coating later. A good chill also prevents them from falling apart during the dipping process.
So far, you’ve baked a delicious cake, mixed it with frosting, and shaped it into perfect little balls. Next, we’ll dive into the fun part – coating and decorating your cake pops. Get ready to unleash your creativity!
Shaping and Cooling in Cake Pop Preparation Guide
Forming the Cake Balls
Now, let’s focus on shaping and setting your cake pops, a pivotal phase in your cake pop recipe. After chilling the mixture, it’s time to give these treats their characteristic round shape. Roll the chilled mixture into balls, ensuring each one is smooth and even. This uniformity is not just about aesthetics; it also guarantees that your cake pops will cook evenly.
Cooling and Setting Tips for Cake Pop Cooking Directions
Once shaped, the next crucial step is cooling. Place the formed balls back in the refrigerator. This cooling period is essential, as it helps the balls maintain their shape when dipped into the warm coating. Moreover, a well-chilled cake ball ensures that the coating adheres properly, giving you a smooth, even finish.
Remember, patience is key during this stage. Rushing might lead to your cake pops falling apart or having an uneven coating. So, give them ample time to set. This attention to detail will pay off when you see your perfectly shaped and coated cake pops.
Decoration and Coating Techniques
Selecting Coatings and Toppings for Cake Pops
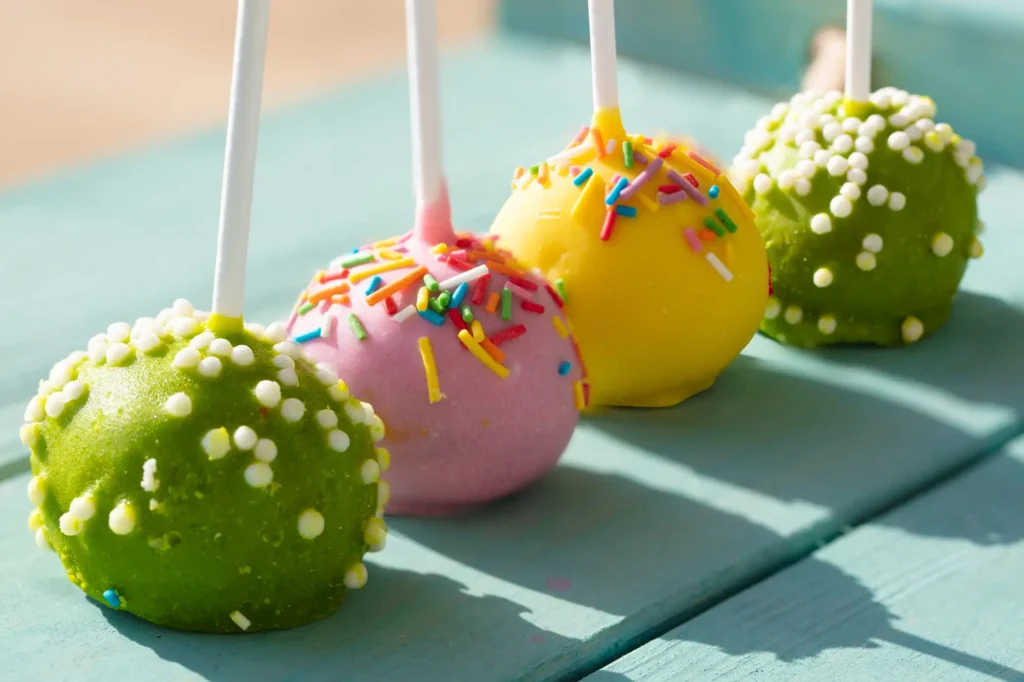
As we delve into the decoration phase of your cake pop recipe, it’s time to choose your coatings and toppings. This is where you can truly showcase your creativity. You have a plethora of options: melted chocolate, candy melts in various colors, and even flavored glazes. Each choice adds a unique twist to your cake pops, making them not just treats, but also works of art.
Creative Decorating Techniques in Cake Pop Creation
Once you’ve chosen your coatings, the fun really begins. Firstly, ensure your cake balls are properly chilled; this helps the coating stick better. Then, dip each ball into the melted coating, swirling gently to cover it completely. Here’s a pro tip: tap off any excess coating for a smooth finish.
Now, for the toppings. Sprinkles, crushed nuts, mini chocolate chips, or even edible glitter – the sky’s the limit. Add these toppings while the coating is still wet, so they stick well. This step is not just about taste; it’s about creating a visual feast too.
Moreover, consider playing with colors and themes. For instance, pastel coatings with delicate sprinkles for a baby shower, or vibrant colors and bold toppings for a birthday party. Your cake pops can be tailored to fit any occasion.
Finally, let your decorated cake pops set. Place them upright in a stand or poke them into a styrofoam block. This ensures they don’t smudge and the coating sets evenly.
In the next part, we’ll explore innovative ways to serve and present your beautifully decorated cake pops. It’s not just about making them; it’s about showcasing them in all their glory!
Serving and Presentation Ideas
Innovative Serving Ideas for Cake Pops
After mastering the cake pop recipe, it’s time to think about presentation. How you serve these delightful treats can be just as important as their taste and appearance. For a start, consider the occasion. Are these cake pops for a casual get-together or a formal event? This context can guide your presentation style.
One charming idea is to arrange your cake pops in a bouquet, mimicking flowers. This not only looks stunning but also makes for an interactive dessert experience. Alternatively, for a more modern and sleek look, line them up on a chic tray or cake stand. This approach is not only visually appealing but also practical, making it easy for guests to pick their favorite.
Discover more dessert presentation ideas at Epicurious.
Presentation Tips for Special Occasions with Cake Balls
Moreover, think about personalization. Adding small tags or decorations that match the event’s theme can elevate your cake pops from delicious treats to memorable favors. For instance, for a wedding, you might use the couple’s initials or wedding colors.
Finally, remember that the way you present your cake pops can reflect your personal style and creativity. So, don’t be afraid to experiment and have fun with it. After all, part of the joy of baking is sharing your creations in a way that brings smiles to people’s faces.
Troubleshooting Common Issues in Cake Pop Making
Solving Common Cake Pop Problems
Even with the best cake pop recipe and techniques, you might encounter a few hiccups along the way. Fear not, for these challenges are often easily solvable. Let’s address some common issues and their solutions.
Firstly, if your cake pops are falling off the sticks, it’s likely due to the mixture being too moist or heavy. The fix? Ensure your cake-to-frosting ratio is balanced and your cake balls are adequately chilled before dipping.
Another common problem is cracking in the coating. This often happens when the cake balls are too cold, causing the coating to set too quickly and contract. To prevent this, let your chilled cake balls sit at room temperature for a few minutes before dipping.
Moreover, if you’re struggling with uneven coating, it might be due to the coating being too thick. Try thinning your chocolate or candy melts with a bit of coconut oil or shortening for a smoother dip.
Lastly, if you find your cake pops are too dry, it could be an issue with the cake itself. Make sure you’re using a moist cake recipe and not overbaking it. A little extra care in the baking stage can make a big difference.
Remember, practice makes perfect. Each batch of cake pops is an opportunity to refine your skills and learn new tricks. So, keep at it, and soon you’ll be a cake pop pro!
Healthier Alternatives and Variations in Cake Pop Recipes
Gluten-Free and Vegan Options in Cake Pop Method
Adapting your cake pop recipe to cater to dietary restrictions or health preferences is easier than you might think. For those seeking gluten-free options, simply substitute the regular cake base with a gluten-free cake mix or recipe. The key here is to ensure the gluten-free cake is just as moist as its traditional counterpart.
For vegan cake pops, replace the standard ingredients with vegan-friendly alternatives. Use a vegan cake recipe and plant-based frosting. Vegan chocolate and candy melts are also readily available for coating. These substitutions are not only healthier but also inclusive, ensuring everyone can enjoy your delightful treats, Explore more plant-based dessert ideas in our comprehensive Vegetarian Cooking Guide.
Low-Sugar Variations in Cake Ball Instructions
Additionally, if you’re aiming for a lower sugar content, consider using a sugar-free cake mix or reducing the sugar in your homemade recipe. For the coating, opt for dark chocolate with a high cocoa content, as it typically contains less sugar. You can also explore natural sweeteners like stevia or monk fruit as alternatives.
Remember, making healthier cake pops doesn’t mean compromising on taste. With the right ingredients and a bit of creativity, you can create treats that are both delicious and nutritious. So, go ahead and experiment with these variations – your body (and your taste buds) will thank you!
Conclusion: Enjoying Your Homemade Cake Pops
Final Thoughts and Encouragement in Cake Pop Creation
As we conclude our journey through the cake pop recipe, remember that each step, from choosing ingredients to the final decoration, is an opportunity for creativity and fun. Whether you’re making them for a special occasion or just as a treat, the joy of cake pop making lies in the process as much as in the tasting.
Don’t be discouraged by any initial mishaps. Like any culinary endeavor, perfection comes with practice. Embrace each batch as a learning experience. Most importantly, share your creations with friends and family, because happiness, just like cake pops, is best when shared.
For more tips on planning your next party or gathering, check out Martha Stewart’s Party Planning Tips.
Thank you for following along this sweet adventure. May your kitchen always be filled with the aroma of baking and the joy of cake pop making!